
What is ScrollMagic? Well here’s what it says on the tin:
“The javascript library for magical scroll interactions. ScrollMagic helps you to easily react to the user’s current scroll position…”
I used this recently to build a few parallax effects into some case studies for Brave, and got bit stuck because of the documentation and example files being set up differently. After playing with this library for about a week, I feel confident to condense my learnings and pass them on to whomever feels like making use of this witchcraft.
1. Getting set up.
Download all the necessary files and include them in your html:
<script src=’..//jquery.min.js'></script>
<script src=’..//TweenMax.min.js'></script>
<script src=’..//ScrollMagic.js'></script>
<script src=’..//animation.gsap.min.js'></script>
<script src=’..///debug.addIndicators.min.js'></script>
2. Initialising a Controller
Initialise a ScrollMagic controller, you can have multiple controllers but you can also make use of only one controller if you prefer.
var yourControllerName = new ScrollMagic.Controller();
3. Setting up the Scene
Set up a scene and assign a trigger element to it, set a duration for the animation (Note: if you dont include the duration it would assume that the duration is 0). You can also include a offset to delay your animation like (offset: 200).
var scene = new ScrollMagic.Scene({
 triggerElement: “#trigger1”,
 duration: 500,
 })
4. Animations
Now for the fun bit: tell the .setTween fuction what element to animate then define the duration and start telling it what to do, e.g:
- backgroundColor: “red”
- left: 300
- scale: 1.2
For the purpose of keeping this simple I’m just adding a simple background color fade…
.setTween(“#animate”, 0.5, {backgroundColor: “red”})
…after you’ve defined all the animations use the .addTo funtion and add the Scene to the controller, like so:
.addTo(yourControllerName);
5. Adding Helpers
If you’re trying to debug or tweak your animation, then the following line can be pretty darn useful, what it does is add little markers (key frames) where your animations begin and end.
.addIndicators({name: “#animate”})
And that’s it, all together now 🙂
var yourControllerName= new ScrollMagic.Controller();
var scene = new ScrollMagic.Scene({
  triggerElement: “#trigger1”,
  duration: 500,
  })
    .setTween(“#animate”, 0.5, {backgroundColor: “red”})
    .addTo(yourControllerName);
    .addIndicators({name: “#animate”})
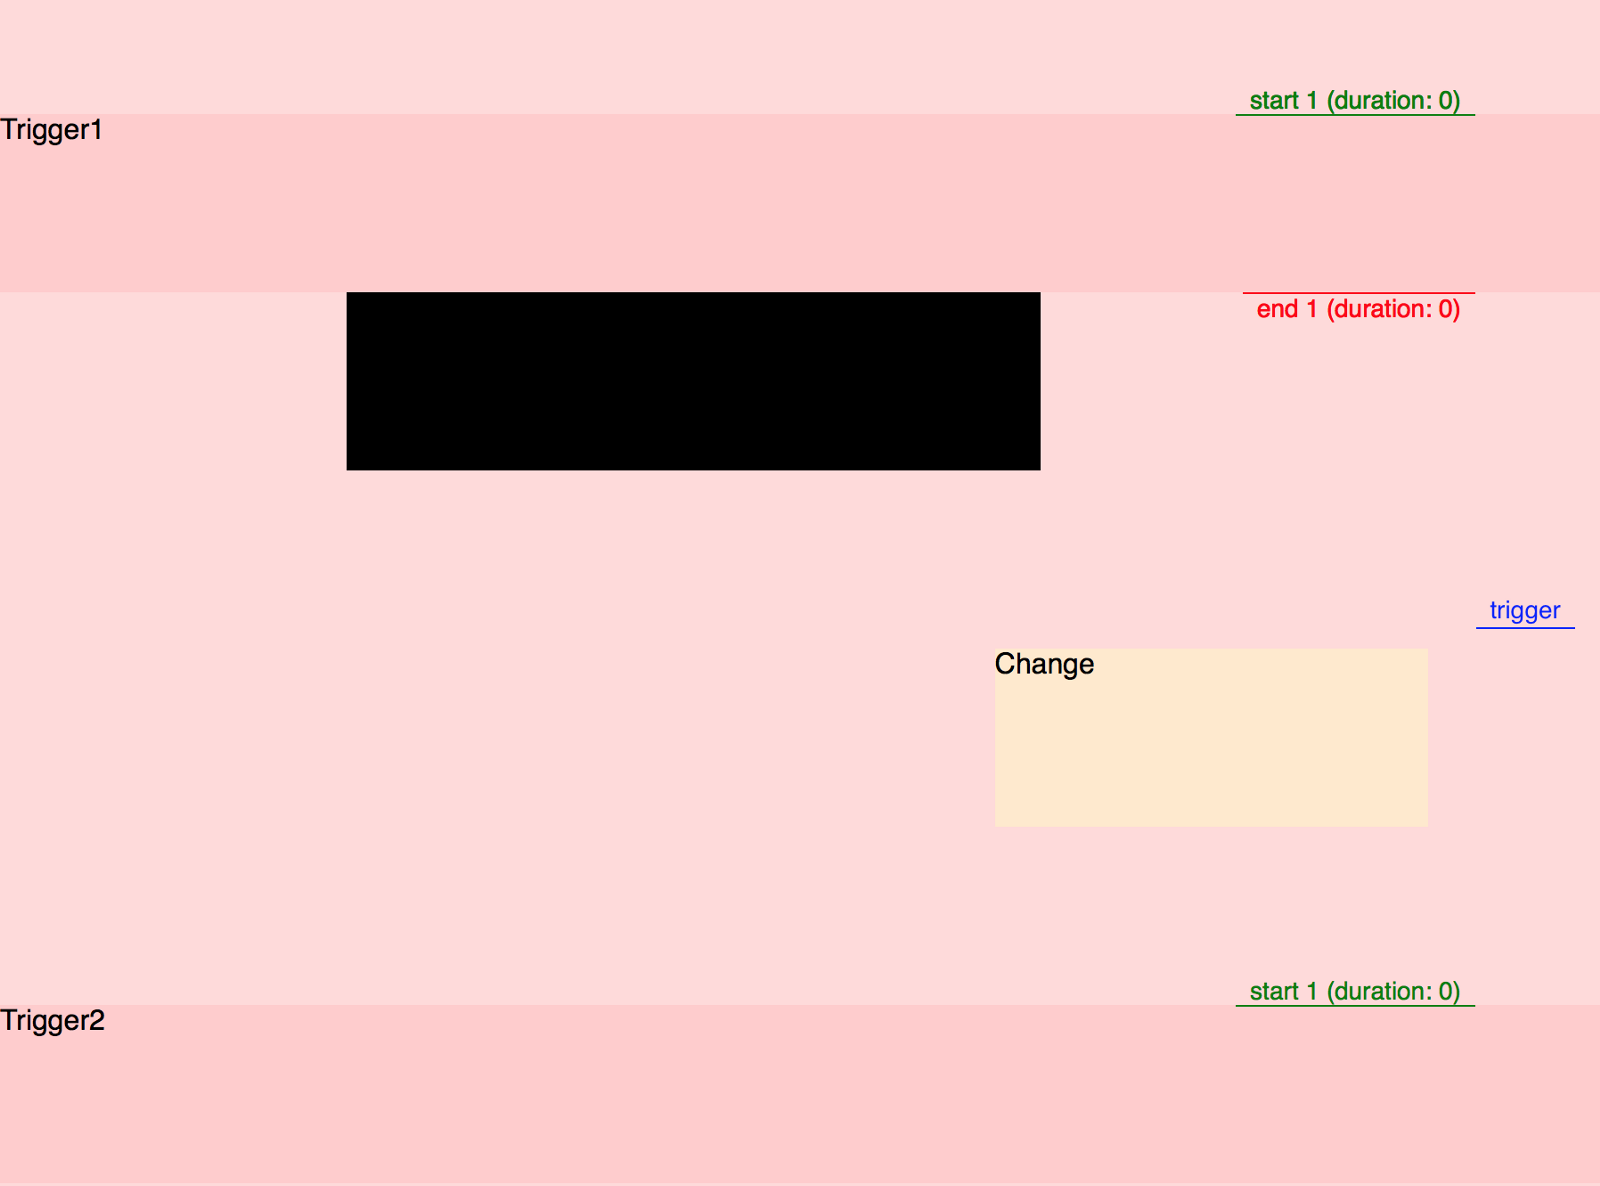
Taking it a little further
Multiple triggers and animations…
So now that you know now how to set up a controller and scene, you may want to start creating complex animation. There are a few ways of creating complex animation: you can trigger a few animations with one trigger and play with offsets, or you can make use of multiple triggers for your animations.
Tip: When manipulating elements to move in the dom it helps to set your elements positioning to absolute and their parent to relative. This way, you can highlight the parent and see exactly how your elements are moving within it.
So just like before, you would set up your controller and scene, but this time you can create a extra scene and just add the new trigger and animation
var controller = new ScrollMagic.Controller();
var scene = new ScrollMagic.Scene({
  triggerElement: "#trigger1",
  duration: 100,
  tweenChanges: true
  })
  .setTween("#animate1", 0.5, {width: "200px", left: "100px"})
  .addIndicators({name: "Animate 1"})
  .addTo(controller);
var scene = new ScrollMagic.Scene({
  triggerElement: "#trigger2",
  duration: 100,
  tweenChanges: true
  })
  .setTween("#animate2", 0.5, {backgroundColor: "#FFE9CC", width:
  "300px", right: "200px", top: "200px"})
  .addIndicators({name: "Animate 2"})
  .addTo(controller);
 Now I know how I hate it when someone posts a tutorial and doesn’t include any code for me to just test with locally, so here you go, now go be sexy…
<!DOCTYPE html>
<html>
<head>
 <title>Test 1</title>
 <meta charset="UTF-8">
 <link rel="stylesheet" href="css/normalize.css">

<style media="screen">
 .demo{max-width: 900px; margin: auto;}
 .s1{height: 100px; background: #FFCCCC;}
 .s2{height: 400px; position: relative; display: block;}
 .demo{background:#FFDADA;}
 .box1{
 height: 100px;
 width: 100%;
 background: red;
 margin: 0;
 left: 0;
 display: block;
 position: absolute;
 opacity: 0;
 }
 .box2{
 height: 100px;
 width: 10%;
 background: red;
 margin: 0;
 right: 0;
 display: block;
 position: absolute;
 opacity: 0;
 }
 p{margin: 0;}
 .part{width: 50%; display: block; float:left; padding: 20px 0;}
 </style>

</head>
<body>

<section class="demo">

 <div class="s2"></div>

 <div id="trigger1" class="s1">Trigger1</div>

 <div class="s2">
 <div id="animate1" class="box1"><p>Change</p></div>
 <div id="animate2" class="box2"><p>Change</p></div>
 </div>

 <div id="trigger2" class="s1">Trigger2</div>

 <div class="slideScene">
 <div id="animate3" class="part"><p>Part1</p></div>
 </div>

 <div class="s2"></div>

</section>

<script src=’http://cdnjs.cloudflare.com/ajax/libs/jquery/2.1.3/jquery.min.js'></script>
<script src=’https://cdnjs.cloudflare.com/ajax/libs/gsap/1.16.0/TweenMax.min.js'></script>
<script src=’https://cdnjs.cloudflare.com/ajax/libs/ScrollMagic/2.0.3/ScrollMagic.js'></script>
<script src=’https://cdnjs.cloudflare.com/ajax/libs/ScrollMagic/2.0.3/plugins/animation.gsap.min.js'></script>
<script src=’https://cdnjs.cloudflare.com/ajax/libs/ScrollMagic/2.0.2/plugins/debug.addIndicators.min.js'></script>

<script>

function percentage(p){
 return $( document ).width() / 100 * p;
 }

var controller = new ScrollMagic.Controller();

var scene = new ScrollMagic.Scene({
 triggerElement: “#trigger1",
 duration: 100,
 tweenChanges: true
 })
 .setTween(“#animate1", 0.5, {backgroundColor: “black", width: percentage(40), left: percentage(20), opacity: 1})
 .addIndicators({name: “1 (duration: 0)"})
 .addTo(controller);

var scene = new ScrollMagic.Scene({
 triggerElement: “#trigger1",
 duration: 100,
 tweenChanges: true
 })
 .setTween(“#animate2", 0.5, {backgroundColor: “#FFE9CC", width: percentage(25), right: percentage(10), top: “200px", opacity: 1})
 .addIndicators({name: “1 (duration: 0)"})
 .addTo(controller);

var scene = new ScrollMagic.Scene({
 triggerElement: “#trigger2",
 duration: 200
 })
 .setTween(“#animate3", 0.5, {backgroundColor: “purple", })
 .addIndicators({name: “1 (duration: 0)"})
 .addTo(controller);
</script>

</body>
</html>