Creating UI’s with React Native & NativeBase
ReactNative Setup
You will need Node.js, Watchman, the React Native command line interface, and Xcode installed locally.
brew install node
brew install watchman
Install the React Native command line interface. You might get an error asking to run as root/administrator, if so, just run with prefixing sudo:
npm install -g react-native-cli
And Xcode you can install directly from the Mac App Store
Create a new ReactNative project and cd in the directory:
react-native init ReactNativeProject
cd ReactNativeProject
To run the application, run the following command:
react-native run-ios
This will open up a second terminal window for packaging, and the Xcode iPhone simulator.
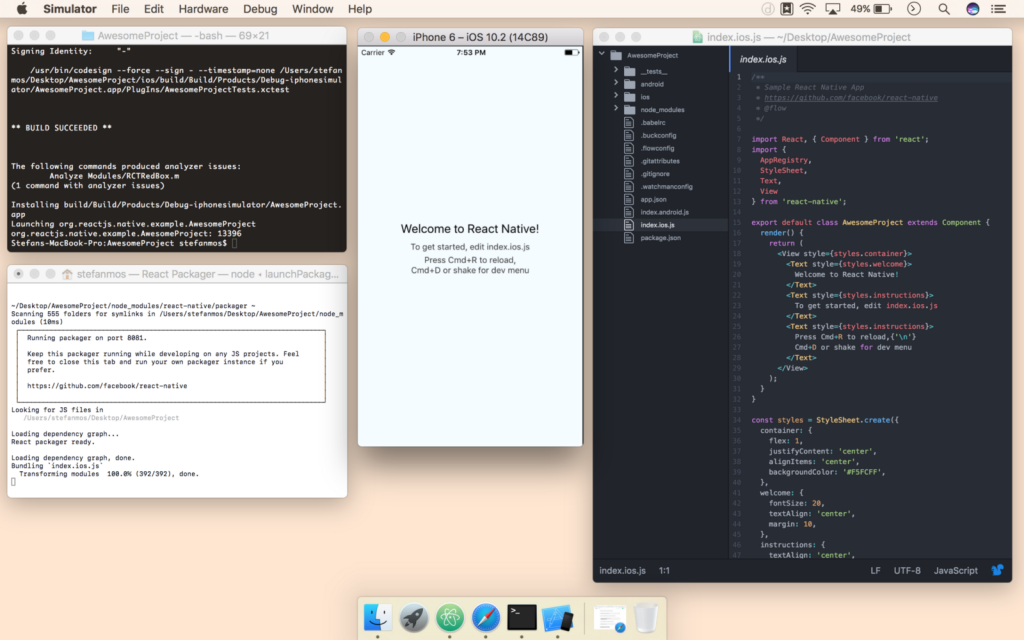
Let’s take a closer look at what the generator created for us…
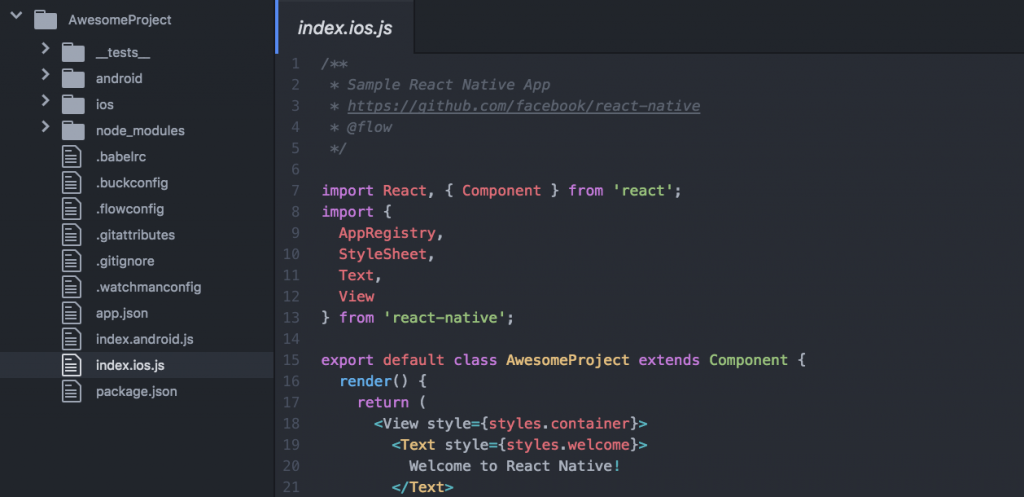
AwesomeProject
  -- __tests
  -- android
  -- ios
  -- node_modules
  .babelrc
  .bucketconfig
  .flowcongig
  .gitattributes
  .gitignore
  .watchmanconfig
  app.json
  index.android.js
  index.ios.js
  package.json
A basic interface
Open up the index.ios.js. If you have worked with React before, you should be quite familiar with the way our code is setup. If not, don’t worry, I’ll explain every part as we move through the code.
Firstly, when importing all the modules that you’ll be using inside of your component, you’ll notice, in the second import, that the generator has added AppRegistry, Stylesheet, Text, View. It’s pretty straight forward. If you need a button, you can simply just add Button inside of the import, and so forth.
#index.ios.js
import React, { Component } from 'react';
import {
  AppRegistry,
  StyleSheet,
  Text,
  View
} from 'react-native';
Next, let’s look at the component. When writing React components in ES6, you can make use of the class YOURCOMPONENT. This extends Component to create a new React component. Inside of this component you need a render() method and a return to send your component inside your view.
As a note, your React component always needs to be enclosed by a block element. For instance, to tell React to render an ‘H1’ and a ‘p’, you would need to wrap these inside a div. In the starter example, you’ll notice that they have enclosed their component with a <view></view>.
#index.ios.js
export default class ReactNativeProject extends Component {
  render() {
    return (
      <View style={styles.container}>
        <Text style={styles.welcome}>
          Welcome to React Native!
        </Text>
        <Text style={styles.instructions}>
          To get started, edit index.ios.js
        </Text>
        <Text style={styles.instructions}>
          Press Cmd+R to reload,{'\n'}
          Cmd+D or shake for dev menu
        </Text>
      </View>
    );
  }
}
To style components, we set up a const names styles, set this equal to Stylesheet.create() and then define our CSS as a Javascript object. Notice how ‘fontSize’ isn’t ‘font-size’? This is because javascript already has a lot of these keywords reserved. Instead, we use CamelCasing to define properties, and we also need to place our values inside single quotes.
#index.ios.js
const styles = StyleSheet.create({
  container: {
    flex: 1,
    justifyContent: 'center',
    alignItems: 'center',
    backgroundColor: '#F5FCFF',
  },
  welcome: {
    fontSize: 20,
    textAlign: 'center',
    margin: 10,
  },
  instructions: {
    textAlign: 'center',
    color: '#333333',
    marginBottom: 5,
  },
});
And lastly we need to register the component as follows:
#index.ios.js
AppRegistry.registerComponent('ReactNativeProject', () => ReactNativeProject);
NativeBase Setup
So now for the fun bit, building our own components with NativeBase’s cross-platform UI component library…
Install NativeBase and link to Install Peer Dependencies:
npm install native-base --save
react-native link
Next, we are going to add a NativeBase Header to our React component…
import { Container, Header, Title, Content, Footer, FooterTab, Button, Left, Right, Body, Icon } from 'native-base';Now let’s replace everything inside of our render method with the following:
export default class ReactNativeProject extends Component {
  render() {
      return (
          <Container>
              <Header>
                  <Left>
                      <Button transparent></Button>
                  </Left>
                  <Body>
                      <Title>Header</Title>
                  </Body>
                  <Right>
                      <Button transparent></Button>
                  </Right>
              </Header>
          </Container>
      );
  }
}
Reload your app, rinse and repeat, and you’ll have UI in no time.
References:
- http://nativebase.io/docs/v2.0.0/getting-started
- https://facebook.github.io/react-native/
- https://github.com/react-native-community/react-native-elements